In this Know-How post, you will discover how drawing and painting can harmonise to create an expressive elephant artwork.
It is a known fact that drawing underpins the art of painting. Furthermore, pencil drawing can enhance and develop a painting. In this post, you will not only develop strategies to develop your drawing skills, but you will also be guided in how to effectively add watercolour washes to your work.
Contents:
- The paints to use
- The type of paper to use
- The best drawing equipment to use
- Where to find reference photos
- How to use drawing aids
- How to draw your image
- How to apply the first layer of colour
- How to apply the mid tone layer of colour
- How to apply the darker tones
- How to add the final layer of drawing
- Further reading
- Useful course links
The paint
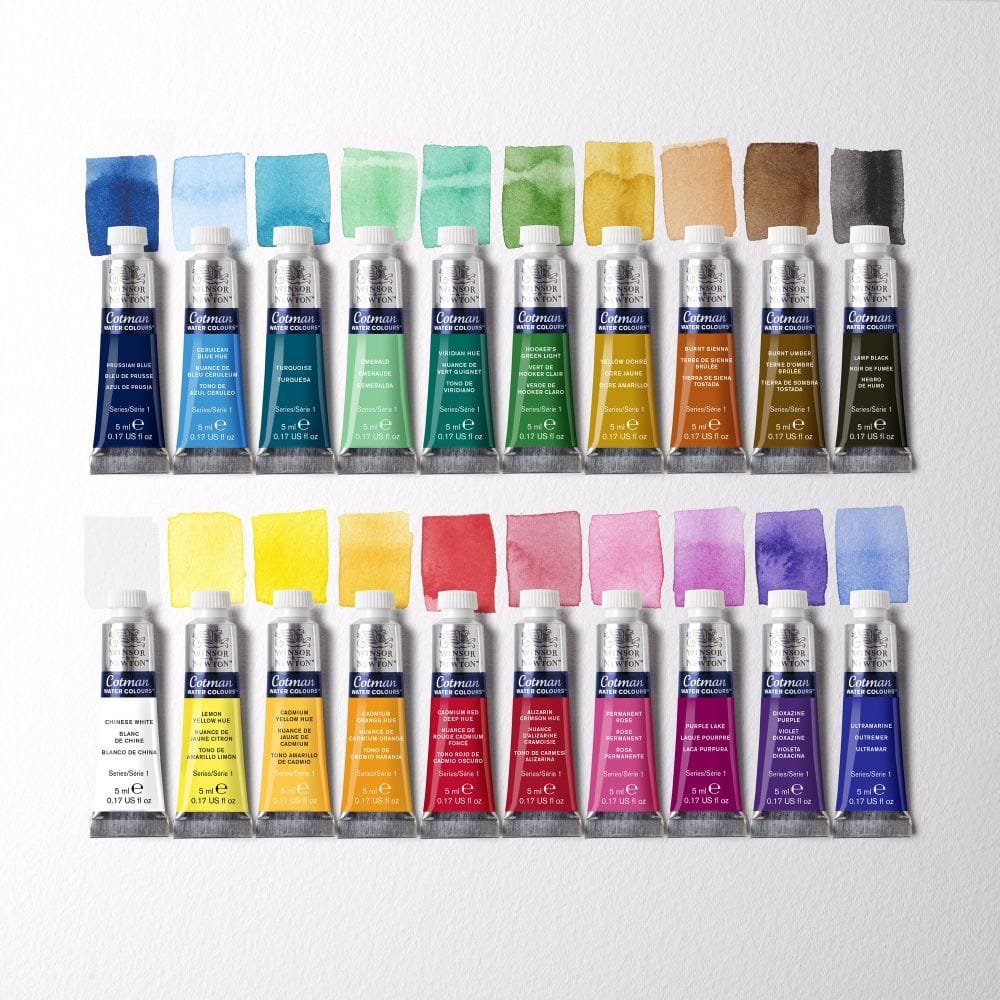
This elephant painting can be created with just a few basic colours.
Firstly, I recommend using Winsor and Newton Cotman watercolour paints as they are of good quality, reasonably priced and widely avaialble. You can use either tubed watercolour, or pans.
The colours that you will need are:
- Cadmium Yellow Hue
- Yellow Ochre
- Alizarin Crimson Hue
- Ultramarine
Lastly, you will need a medium sized soft brush such as a number 4, 6 or 8 round.
The paper
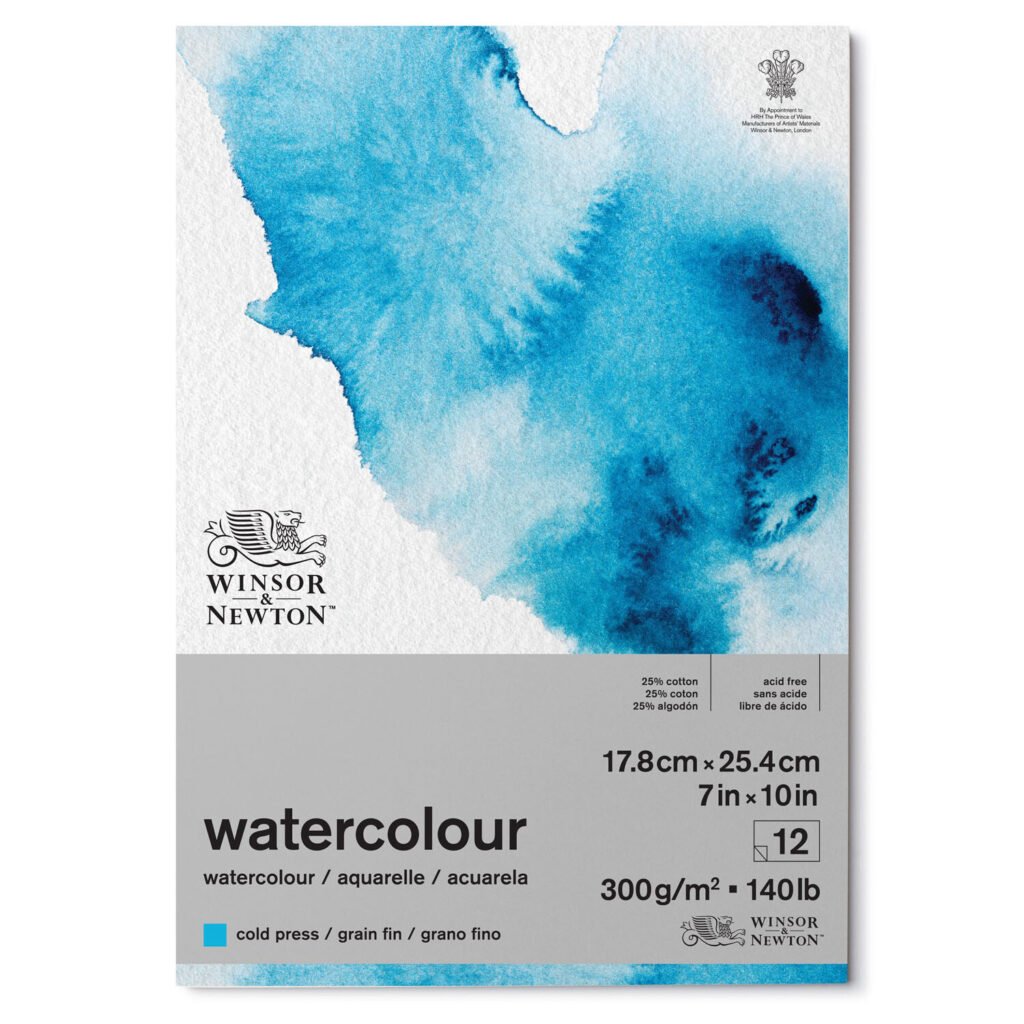
The choice of paper is very important, as a high volume of water is used in watercolour painting.
So, you will need to use watercolour paper of at least 300 grams and cold pressed, as this has a texture suitable for laying washes.
I recommend Winsor and Newton paper as illustrated.
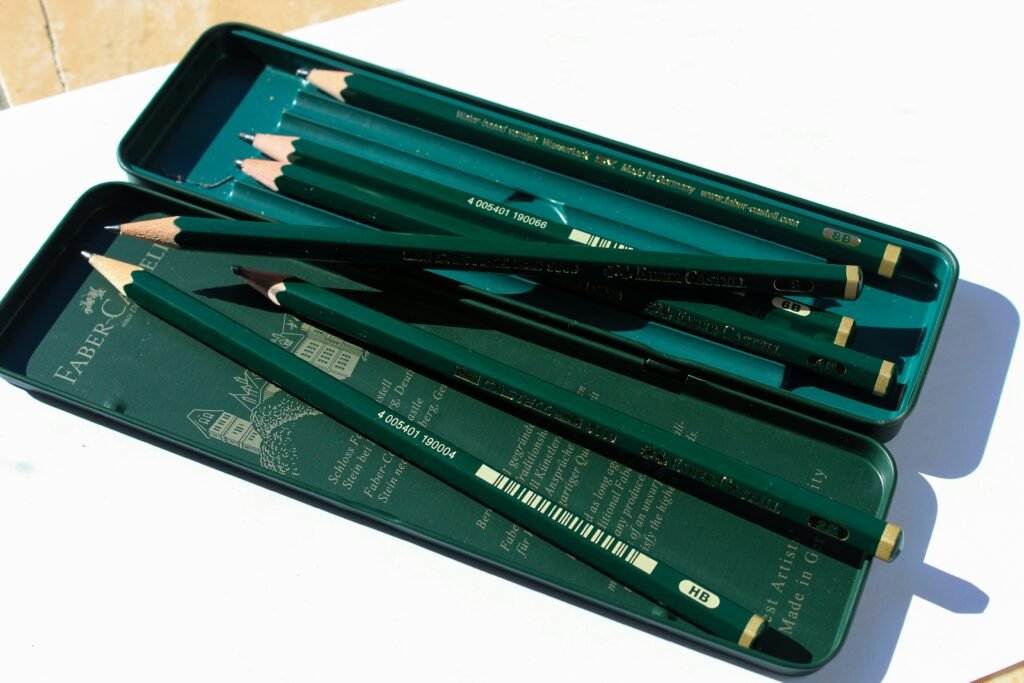
The drawing equipment
Sketching pencils are created in a “B” range such as 2B, 4B, 6B etc. The higher the number, the softer and more black the pencil lead is. For this exercise, I recommend using a 2B pencil as it is a good allrounder.
Lastly, you will also need a ruler if you wish to use the drawing aid explained within this post.
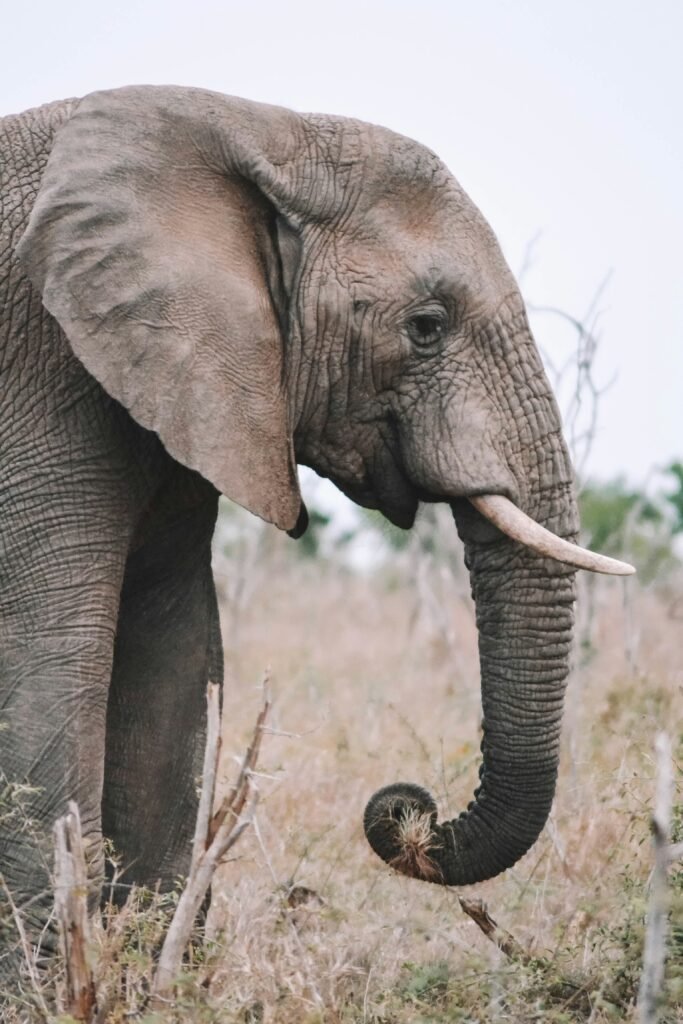
The reference photo
The elephant photo for this exercise has been sourced from unsplash.com. This website offers a great range of royalty-free downloadable images for artists to use.
Here is direct link to download the image:
Drawing aids
If you are feeling a little daunted at the thought of drawing the elephant image, then why not try using a drawing aid?
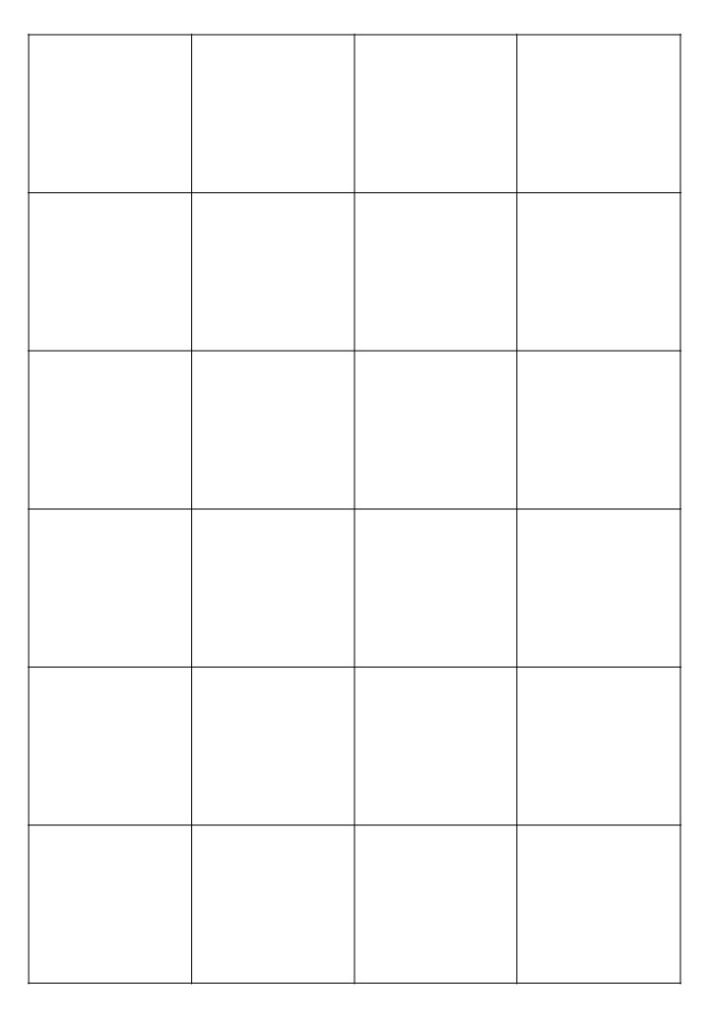
A simple drawing aid is a drawing grid. It is achieved by drawing the same-sized grid both onto the reference photo and also the watercolour paper.
Alternatively, you can easily add a grid to a photo using online tools, such as Gridraw and mobile apps such as Griddr.
The idea of a drawing grid is, by having the same grid on both your reference photo and paper, you can then draw what you see in each square. In this way, the grid can pinpoint the image placement accurately.
The pencil drawing
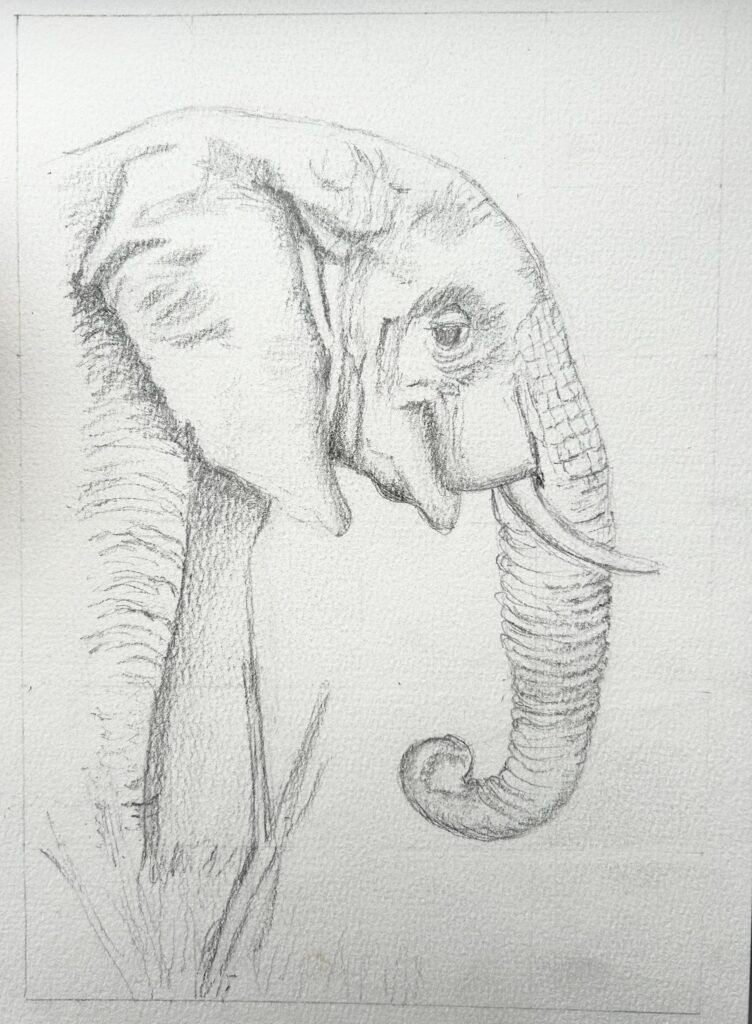
The first stage of the task is to sketch the elehant image using your 2B pencil.
Look closely at the dark areas that you need to achieve and apply firmer pressure and layers of shading to achieve this.
Light pressure and delicate strokes are used to achieve light shading. In addition, using small swirling marks can help to blend your shading.
Top Tips:
- avoid drawing a heavy outline around your image as this will create a cartoon-like effect.
- Don’t forget to curve your drawn lines on the legs and trunk to create a round form. Straight lines will flatten the form.
The initial background wash
To start with, apply an even coat of plain water over the whole of your paper using a medium sized brush. Your paper may bend a little, but don’t worry, because as the water absorbs into the paper, it will flatten back down again.
Next, make a wash in your palette using diluted Cadmium Yellow Hue. Make sure to add plenty of water so that it will spread well when added to your paper.
Next, load your brush with the colour and add it in dabs over the background. The dabs of colour should spread across the wetted paper creating a mottled effect.
Avoid painting on solid areas as this will be less interesting. Also, avoid using too strong a colour as this will bring the background visually forward and overshadow the elephant image.
N.B. This painting exercise simplifies the background and you will not need to paint the sky and the bushes.
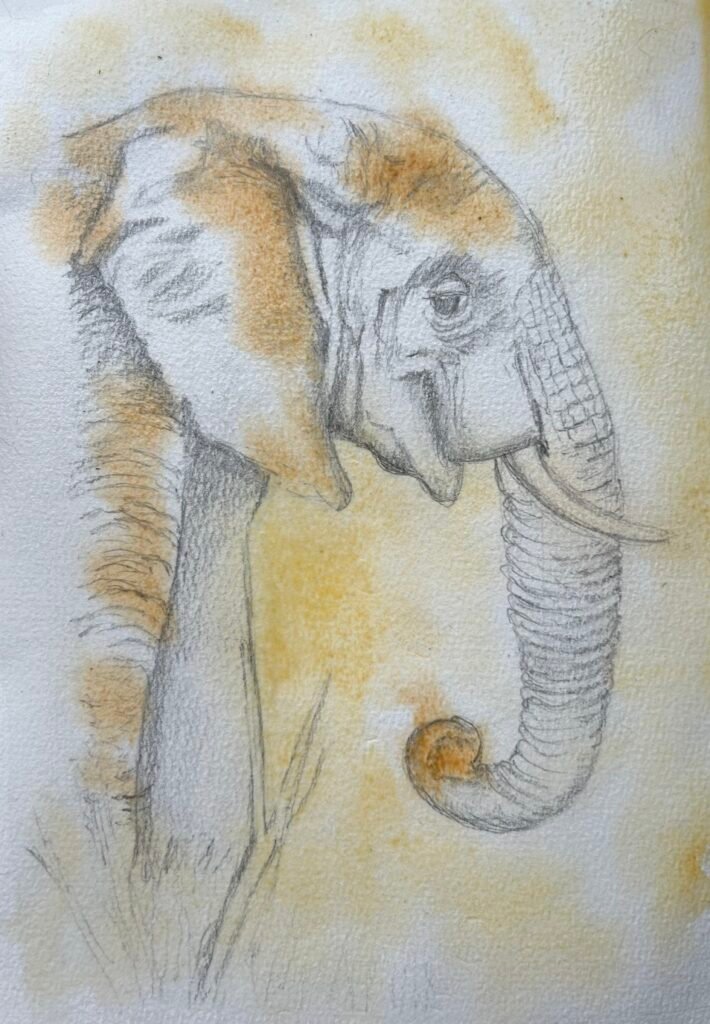
The mid-tone washes
Now, make a wash using the yellow ochre watercolour. Don’t forget to add plenty of water to the mixture so that it will spread nicely on your wetted paper.
Now apply the yellow ochre wash to the areas of the elephant where you can see a yellow hue in the photo. For example, the top of the head, the right side of the ear, parts of the trunk and also the left leg.
N.B. add your colour in small strokes and avoid covering too much white of the paper as this creates the highlights.
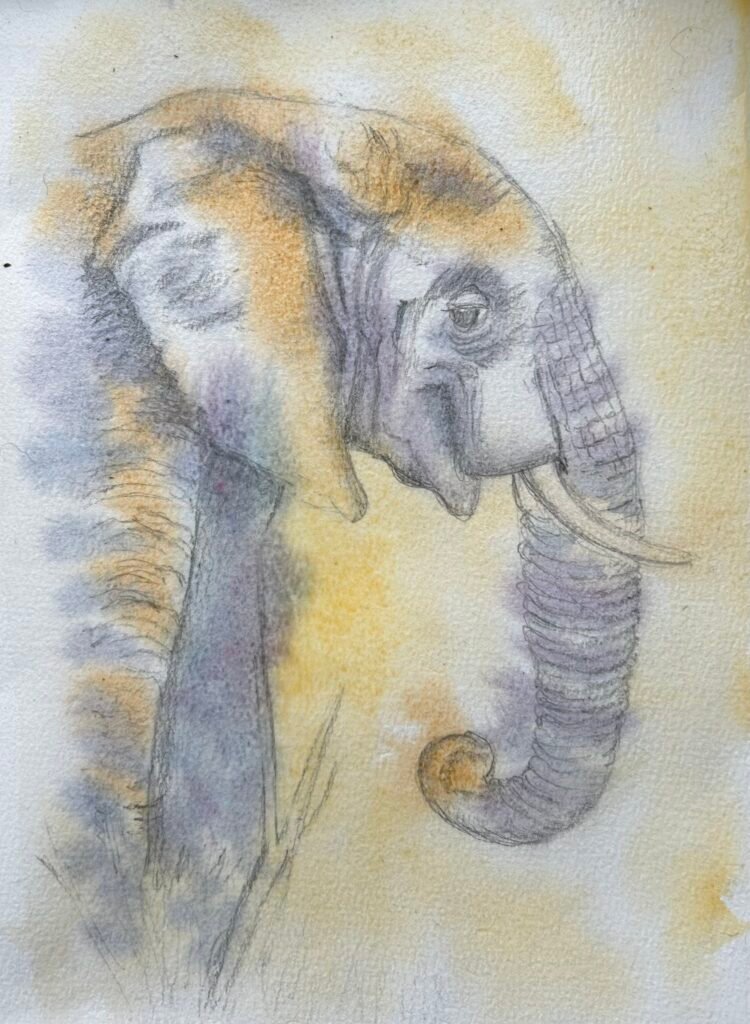
The dark-tone washes
Now that the lighter and mid tones have been established, it is time to add the darker tones.
For this, you will need to create a purple hue. This is simply achieved by mixing the crimson and ultramarine together.
Initially, start with a mixture of 50:50 of each colour and adjust to achieve a violet-blue tone rather than a pinkish one.
Whilst your paper is still damp, add the purple wash to the elephant body area. This should be achieved in light strokes of colour rather than blocking in colour solidly.
The aim is to achieve mottled colour that does not cover the yellows or white areas fully.
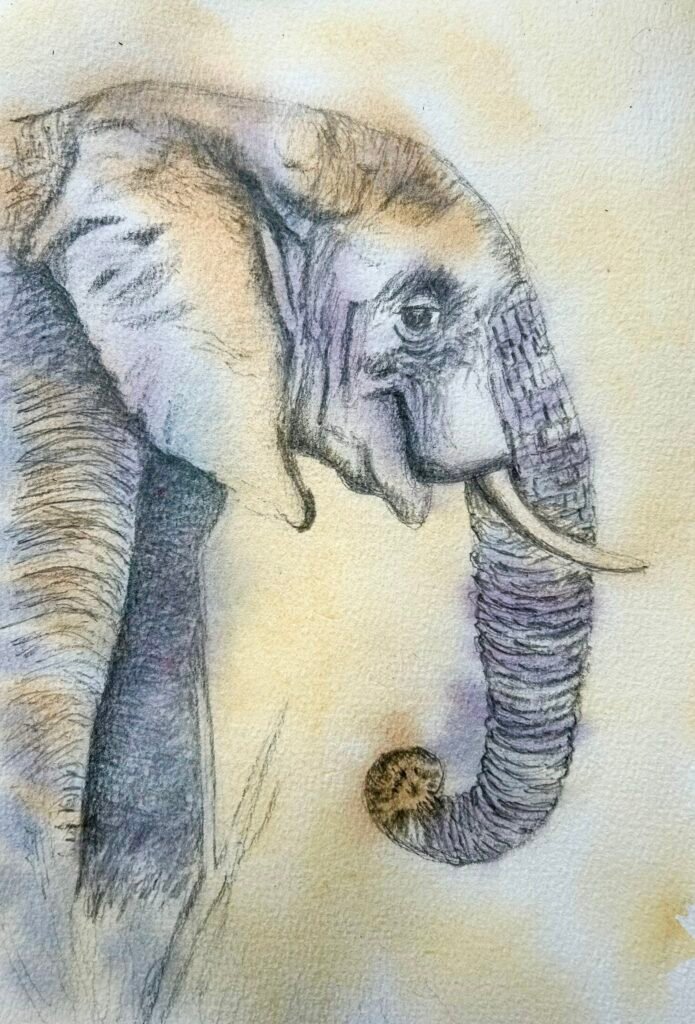
The final pencil layer
The watercolour will have washed away some of your initial pencil drawing and now faded the greys. Therefore, you will need to work back into your artwork with more pencil tones.
You may also wish to continue to add a few more washes in layers until you achieve the look that you want.
N.B. You can work into damp paper with pencil and you will achieve a blacker tone. However, avoid too much heavy pencil pressure on very wet paper, as this could result in damaged paper.
Final note: although tempting to do so, you do not need to draw in a lot of background grasses. In order to keep the sketchy qualities of the artwork and not to detract from the main subject, just a few indicated grasses can be enough.
I hope that you have enjoyed reading this post and that you will have fun completing the task.
I would love to see the finished artworks, so don’t forget to tag @backbury house retreats into your Facebook or Instagram posts. Alternatively, you may prefer to email your images to sbrookes@bhretreats.co.uk
You may also wish to spread the word about this know-how post by sharing it with your friends. If so, simply copy and paste the URL.
Lastly, if you would like to have a go at more know-how exercises or attend an in-person course, please scroll down for some useful links.
Happy painting!


0 Comments